Saturday 4 June 2016

May Favourites

1

I realised that I haven't posted a favourites blog in a while and since May has been and gone, I thought it was about time for another. Let me know in the comments below what your favourites have been this month and if you agree with any of mine...

First up is a bit of a strange one. It's the weather. So if you live in England, like me, you probably will have realised that the weather has been a bit strange this month! There really was something for everyone: snow and hail in the first few days; lots of rain, but that also meant rainbows; storms in some parts; and now sun! It is predicted that 2016 could be one of the hottest years on record, although weather forecasters have been very wrong previously! Obviously it is kind of bad that it is so warm, as it is mostly due to climate change and the warming of our planet, but I'm not complaining-if I actually get a tan this year then I will be very pleased! What has the weather been like where you live?


Paperchase released quiet a few new stationary collections earlier this year, called Let's Squawk, Wild Blossom , Aqua Marine, Serengeti, Get away and Hello Sweetie! They are all really nice and, as Paperchase ranges usually are, full of character. My favourites are the Let's Squawk Sticky Note Book and the Aqua Marine Ideas Journal and Gel Notebook. The only problem with Paperchase products, especially the notebooks and journals, is that I find is that they are so nice I don't want to ruin them by writing in them! I don't need any more notebooks as I have so many that are empty but I always want more as Paperchase are always releasing new ranges!
I am also part of  the 'Treat Me' scheme at Paperchase. I joined recently as it sounded like I would get quite a lot out of it. This part was definitely true-it is free to join and there are so many perks! Just a few of these include - a £5 gift on your birthday (for up to 2 weeks afterwards), free click and collect, a £5 reward for when you spend over £50 (this is not in one shop, it adds up over a period of 6 months) and 15% off of your first purchase within 30 days after your card has become valid in a store. There are also tons of treats online and in store available. I definitely would recommend getting this card, if you haven't already, particularly if you are a bit of a Paperchase addict like me!
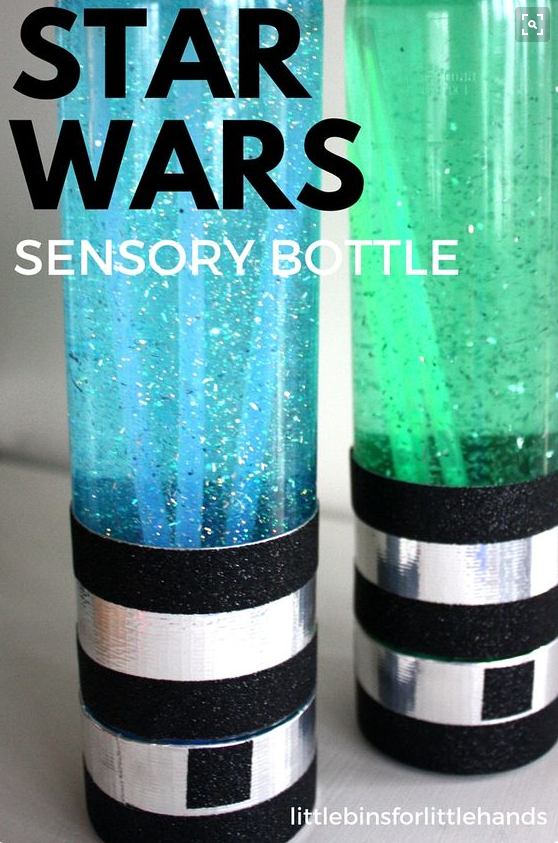
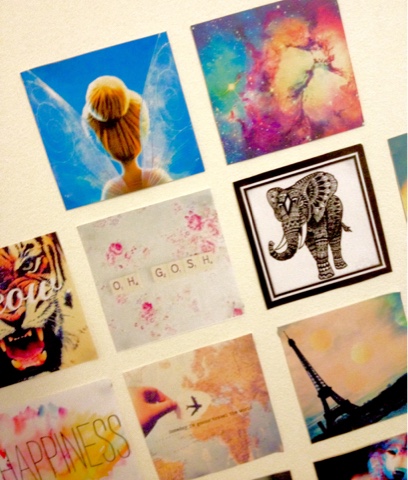
As well as Paperchase, Pinterest has taken up quite a lot of my time recently! I have been busy looking for summer DIYs and food ideas, as well as searching for summer clothes ready for the BBQ weather that we have been promised! It is so easy to use and you can literally spend hours on there scrolling through thousands of pages of pins.

That's all for now! I still can't quite believe that summer is less that a month away! It's been a long time coming but I think I am ready and equipped with my many summer DIYs and food ready to make. Comment below if you would like to see any blogs on summer DIYs etc. and don't forget to follow me on Pinterest @BlogspotBlogger.
Thanks for reading,
Bye for now!


Wednesday 4 May 2016

50 Star Wars Themed Pinterest Ideas

1

Now, today is May 4th which means that today is Star Wars day! That's right, its time to unleash the Stars Wars themed decorations, snuggle up in your Chewbacca onesie and binge watch all of the films so far. I've delved deep inside the thousands of pages of Star Wars themed gifts, DIYs, decorations and much, much more that Pinterest has to offer and narrowed it down to about 50. Let me know in the comments below which ones are your favourites and what you think are the best bits about Star Wars.
So, without further ado, here are 50 Pinterest themed Star Wars ideas for you to try...
Having a party? Try spicing it up with these Star Wars themed snacks...
Getting bored of plain lights strung around and feel in the mood for a mini lightsaber battle? Try these...
Maybe crochet is more your thing and you need some inspiration for a Star Wars lover's gift? What about these crocheted R2-D2 and BB-8 hats?
You can make anything with some old toilet paper rolls and a bit of imagination, even this X-wing fighter
For a more challenging DIY, try this R2-D2 bedside table
Upgrade your boring pencils to these light saber ones
These Chewbacca cupcakes will sweeten up your day

These glow-stick light sabers are an easy DIY for any party


Why don't you try your hand at origami with this Millennium Falcon

 This R2-D2 pencil can is great storage for any desk

Buzzfeed certainly know how to throw a Star Wars themed party


 Everyone will love these Wookie cookies

Hungry for more? Here are 21 more Star Wars DIY projects

 These free printable Star Wars flags can fill up any wall space

Summer is coming! Want to cool down but hate getting your hands cold? Try these light saber ice lollies

This light switch cover is a great idea for any room

I could stare at these Star Wars sensory bottles for hours...

Keep a bit of winter in your house with these Star Wars snowflakes

These terrariums are a bit more of a challenge


Why not try some of these awesome DIYs! Let me know in the comments below which are your favourite, I really like the light switch cover!
Happy Star Wars Day
Thanks for reading,
Bye for now!


Friday 19 February 2016

Rose Jam vs. Snow Fairy - Lush Review

0

I realised that so far in my 'Lush According To Me' series, I have reviewed two bubble bars (Candy Mountain and 5 Gold Rings) and two bath bombs (Shoot for the Stars and Twilight) so I decided that it was time to add something a bit different into the mix - shower gels.

Hence the title, you lucky readers will be getting not just one review, but two! Anyway, let's begin...
*suspenseful music begins*
It all started when Lush released two shower gels for winter. Both were pink and sweet smelling, but this was where the similarities ended. These shower gels were prepared for battle! It would be a fight between floral and sugary, snow and rose, fairy and jam-who would conquer, who would rise and, most importantly *record scratches* which shower gel is best?

We'll start with snow fairy. If you've read my review on Candy Mountain, you will know that it has the same sweet, candyfloss scent as this product. Like Candy Mountain, this shower gel also has glitter in, and, as I mentioned before, is pink. I like this shower gel as I am fond of all of the Snow Fairy scented products that Lush has to offer. I am not madly in love with it as it can be quite overpowering, but, I think that it is perfect for a morning shower as it will definitely wake you up!

Onto Rose Jam, this shower gel is quite sweet but has more of a floral scent than a sugary one. This makes it very unique and is perfect for any lovers of flowery scents that are looking for a shower gel to come back to time and time again! 
The prices for the shower gels are;
       
          Snow Fairy    Rose Jam
100g:    £3.95             £4.95
250g:    £7.95             £9.75
500g:   £12.75           £16.50
1kg:     £21.50.          £27.95

Bin Them or Bag Them?
Personally, I would bag them both, but, if I had to choose one then it would probably be Rose Jam. They both look good enough to eat but the scent of Snow Fairy is just too sweet for me. Rose  Jam might be slightly more expensive and have no glitter, but I think it's worth it! 
They both will definitely be going on my Christmas list this year, unfortunately I can't stock up any earlier as they are both only released during the Winter season.
It's not just up to me though! What do you think? Have you tried any of these products before? Which one do you prefer? Comment below, I would love to hear your opinions!
Thanks for reading,
Bye for now!

Thursday 18 February 2016

Zoella Fizz Bar Review

0

As requested by aliceinfoodland.blogspot.com (check it out), today I am reviewing the Zoella Fizz Bar. I got given it for my birthday a while ago and have mentioned it in a couple of posts before (click here) but never actually got round to using it...until now!

The packaging follows the rest of Zoe's more summery, fruity line and is a bright teal colour. It also has accent colours pink and yellow which helps the whole packaging to 'pop'. 
The actual fizz bar looked as though it was 4 separate pieces but was actually 2. I used one of these pieces in the bath.
The first thing that I loved about this product was the scent-I love the smell of this range and as soon as I opened the packaging I could smell it immediately. 
However, once I had put the fizzer in the bath, the scent wasn't so noticeable - I only got a few hints of it.

Obviously with its white appearance and it being a brand that doesn't focus on one product, I wasn't expecting to be the best bath bomb that I had ever used, so, I was very impressed with how long it lasted! It lasted for around 7 minutes and didn't fizz too much so I could easily relax and inhale the scents. 
Afterwards, the water went a bit chalky but eventually it just restored it's natural colour so there was no cleaning up afterwards! 

Bin it or Bag it?
Bag it. I think it's great for a present but, to be honest, if it wasn't branded by Zoella I probably wouldn't buy it for someone. 

Have you used this product? What do you think? Comment below!
Thanks for reading,
Bye for now!

Wednesday 17 February 2016

DIY Room Decor: Picture Heart

0

Hi everyone, I hope you're having a great day, thanks for stopping by my blog! Today's post is a first for me-I've never blogged any sort of room decor before which is quite surprising as I live for it on YouTube and Pinterest! I usually just watch the videos and wish that I had the time, effort and supplies to do them, however, I saw a picture of this DIY on Pinterest and realised how simple it would be to recreate, personalise, and switch it up for different seasons or however I'm feeling!

It's basically a heart made up of pictures of the things you love, inspirational quotes or whatever you would like. 
All you need is: a pair of scissors, a guillotine (optional), some pictures (any sort-printed from the Internet or actual photographs) and some blue tac to stick the pictures onto the wall with!
Here's how to do it:
1) Print off 27 pictures of the same size from the Internet, Tumblr, Instagram, Pinterest etc. you may need to crop some down or change the size to get them all the same.

For mine, I just searched on Google Images 'tumblr quotes', 'tumblr photographs', 'tumblr disney' etc. until I found 27 images that I liked. 
If you would like a slightly larger heart or have too many images, then print 40 pictures for the next size up. Additionally, if you don't have much printer ink or many pictures, you could go for a smaller heart of 16 images. I wouldn't recommend going any smaller than 16 but you can if you want.
2) Cut the pictures out with a guillotine for straight edges or use some scissors if you don't have one.
3) Blue tac the backs of the pictures before laying them out on a table, desk or floor in the order that you would like and the design that fits the amount of pictures that you have (see below)
If you have 16 images then you need to do (starting from the bottom) a row of 1 image, then 3, then two rows of 5. For the top row, you should leave a gap of 1 picture, then place 1 picture, leave a gap, place 1 and finally leave a gap.
For 27 images, you need to do a row of 1 image, then 3, then 5, then two rows of 7. For the top row, you should leave a gap of one picture, then place 2, leave a gap of 1, place 2 and finally, leave a gap (see image above for more details).
Finally, if you are using 40 images, you should do a row of 1, then 3, then 5, then  
7, then two rows of 9. For the top row you should leave a gap of one, place 3, leave a gap of 1, place 3 and leave a gap of 1.
For an even larger heart, well, you get the idea!
Here's a few pictures of my final heart:


I think that this DIY is great as it's so personalisable as you can easily change the size of the heart and pictures, not to mention the amount of images there are out there and what you can do with them!
Comment below if you try this decor and how you made it your own and if you would like to see more of these DIYs in the future! 
Thanks for reading,
Happy Valentines Day (I know it's a bit late),
Bye for now!

Oreo Cupcake Recipe!

0

Hi everyone! It's time for my first ever recipe post! I made these scrumptious cupcakes a while ago (the picture below is taken from the page I got the recipe from) but since my laptop was out of action (click here) I could not post the recipe, sorry about that!

Anyway, I found this recipe, along with many others, on one of my go-to cooking/baking websites-BBC Good Food. They have recipes by famous cooks like Paul Hollywood, Mary Berry... as well as from the public of Great Britain! This recipe, was posted by a member of the website (I will post a link to the original recipe at the end of the post) so I will not be taking any credit for the recipe itself. I used the exact quantities of ingredients that the recipe suggested but I got more like 18/20 cupcakes than the 12 that the recipe said would be made.
This is quite a quick and simple bake that only took me about 35 minutes to do! So, without further ado, here's the list of ingredients and the method needed to make these delicious Oreo cupcakes with hidden surprises at the bottom!

For the cakes;                              For the Frosting;
200g Plain Flour                          100g Unsalted Butter
40g Cocoa Powder                      160g Cream Cheese (Philadelphia etc.)
280g Caster Sugar                       350g Icing Sugar
3tsp Baking Powder.                   6 Oreos (you may need more to decorate)
A Pinch of Salt
80g Unsalted Butter
240ml Whole Milk
2 Eggs
1/2tsp Vanilla Extract
12+ Oreos
12+ Cupcake Cases

Method:
1) Preheat the oven to 170C/160 fan. Line a cupcake tray with 12 cupcake cases (you may need more than this though). Twist 12 (or however many required) Oreos to separate them so that 1 part is plain biscuit and the other half has the cream, you may need to scrape any remaining cream off of the 'plain' biscuit and put it onto the 'creamy' one. By this time, the 'plain biscuit' halves that I had, had disappeared into a magical place commonly known as my stomach! But make sure to place the half with cream into the bottom of each cupcake case.
2) Put the flour, sugar, cocoa powder, baking powder, salt and butter into a large bowl and mix until you get a sandy consistency and everything is combined.
3) Whisk the milk, eggs and vanilla extract in a separate jug then slowly add half into the mixture and beat well to get rid of any lumps and bumps. Then gradually mix in the rest of the milk mixture until you get a smooth consistency.
4) Evenly, pour this mixture into the paper cases so that they are about two-thirds full.
5) Bake the cakes in the oven for 20-25 minutes. You may want to check on them after 15 minutes though as mine were almost done by this time.
6) Whilst the cakes are cooking, smash up 6 Oreos in a bag and set aside.
7) Whisk the butter, cream cheese and icing sugar until light and fluffy. Then, gently fold in the Oreo crumbs that you recently smashed.
8) Once the cakes have cooled, decorate with the frosting. The recipe recommends you pipe the icing but I found the that the icing was to thick to I just spooned it on and spread it across the cakes with a palette knife but you can do it however you like! I didn't, but if you have any leftover Oreos, you can use them to decorate your soon to be gone cupcakes!
Click here for the link to the original recipe on the BBC Good Food website.

I really hope that you try baking these cupcakes as they are sure to turn out a treat! They are especially good for any Oreo lovers out there or if you love a good chocolate sponge but want to switch it up a bit!
Comment below if you have tried baking these cupcakes or any other recipes on the Good Food website! I would also love to know any ideas you might have for future bakes/recipes that you would like me to try / post a blog about!
Thank you for reading!
Bye for now!

Monday 4 January 2016

New Blog Series

0

Ok, so today's blog is just an introduction to a whole series to come. Since I do so many Lush reviews, I have decided to do a series on them called 'Lush According To Me'. I will add my current Lush reviews to the series (Candy Mountain, 5 Gold Rings, Shoot For The Stars and Twilight).
Obviously, I won't be able to post new entries 3 times a week but I will try to do one or two every weekend. I have quite a stash of Lush products in my room, waiting for me to write a review on so it will be a series that goes on for a looooong time! If, for whatever reason, in this period of time, I do not review a Lush product that you would like me to, feel free to comment on any of my posts and I will reply ASAP!
I hope you like this new, upcoming series and what products it may unravel. Please comment below for any bath bombs/bubble bars etc. that you might like me to review. Also comment on what you think of this new series idea!
Thank you,
Bye for now!